CTRL MIXBUS
CTRL MixBus is a professional stereo mixing and processing effect that brings essential mixing tools together in one streamlined plugin. It combines input control, stereo manipulation, equalization, filtering, dynamics, and loudness maximization.
Each applicable processing stage has an independent ON/OFF bypass control, so you can enable or bypass individual stages without interrupting the rest of the signal chain.
Download includes all three versions of CTRL MixBus for MPC, Windows, and Linux.
Download PluginMPC Installation
On the MPC, CTRL MixBus can be installed in two ways: from Plugin Manager's online catalog, or manually by copying the plugin folder to your MPC.
Option 1: Install with Plugin Manager
Your MPC must be connected to the internet to browse Plugin Manager's online catalog.
- Save your currently open MPC project.
- Open Plugin Manager on the MPC.
- Tap the magnifying glass to search.
- Type CTRL to display all available CTRL plugins.
- Tap Done in the bottom right.
- Tap Install next to CTRL MixBus.
- Tap Apply.
- Tap Restart & Apply.
- Tap Restart & Apply once more.
Your device will restart to complete the installation.
Option 2: Install Manually (Without Plugin Manager)
- Download the ZIP archive that matches your MPC:
- Extract the ZIP archive. It contains one folder named CTRL - VST - CTRL MixBus.
- Connect your MPC to your PC with a USB cable.
- Put your MPC into Controller Mode.
- Open File Explorer and locate the MPC User drive.
- If it does not already exist, create a folder named VST2 Plugins in the root directory of the MPC User drive. The name must match exactly.
- Copy the CTRL - VST - CTRL MixBus folder into VST2 Plugins. Copy the folder itself, not the files inside it.
- Safely eject the MPC User drive from your computer.
- On your MPC, tap Standalone to return to Standalone Mode.
Find CTRL MixBus
Once the device has restarted, CTRL MixBus is available in the effects plugin list under External Plugins → CTRL.
Windows Installation
On Windows, CTRL MixBus is a 64-bit VST3 plugin. Your DAW finds it by scanning the standard VST3 folder. The plugin needs to be copied to that location.
Copy the Plugin to the VST3 Folder
- Download and extract the CTRL MixBus ZIP archive.
- Open the extracted Windows folder.
- Copy the CTRL MixBus.vst3 folder.
- Open File Explorer and go to
C:\Program Files\Common Files\VST3. If the VST3 folder does not exist, create it. - Paste CTRL MixBus.vst3 into the VST3 folder. Windows may ask for administrator permission; click Continue.
Register the Plugin in Your DAW
- Open your DAW. Close and reopen it if it was already running.
- If CTRL MixBus does not appear, run a plugin rescan from your DAW's plugin settings.
- Add CTRL MixBus as a VST3 effect on a track or bus.
Linux Installation
On Linux, CTRL MixBus is a 64-bit VST3 plugin. Your DAW finds it by scanning the standard VST3 folders. The plugin needs to be copied to one of them.
Copy the Plugin to the VST3 Folder
- Download and extract the CTRL MixBus ZIP archive.
- Open the extracted Linux folder.
- Copy the CTRL MixBus.vst3 folder to one of these locations:
~/.vst3for your user only. This is a hidden folder in your home directory. Create it if it does not exist./usr/lib/vst3for all users on the system. This may require sudo access.
To install for your user from a terminal, run this from the extracted Linux folder:
mkdir -p ~/.vst3 && cp -r "CTRL MixBus.vst3" ~/.vst3/
Register the Plugin in Your DAW
- Open your DAW. Close and reopen it if it was already running.
- If CTRL MixBus does not appear, run a plugin rescan from your DAW's plugin settings.
- Add CTRL MixBus as a VST3 effect on a track or bus.
Pages & Signal Chain
CTRL MixBus is organized into four pages:
- INPUT: Gain, phase, stereo width, balance, transient shaping, and gate.
- FILTER: Low-pass filter, high-pass filter, and the DJ EQ.
- OUTPUT: Compressor, maximizer, and output level.
- UTILITY: DSP load, signal readings, and plugin information.
Audio passes through the following stages in order:
Q-Links
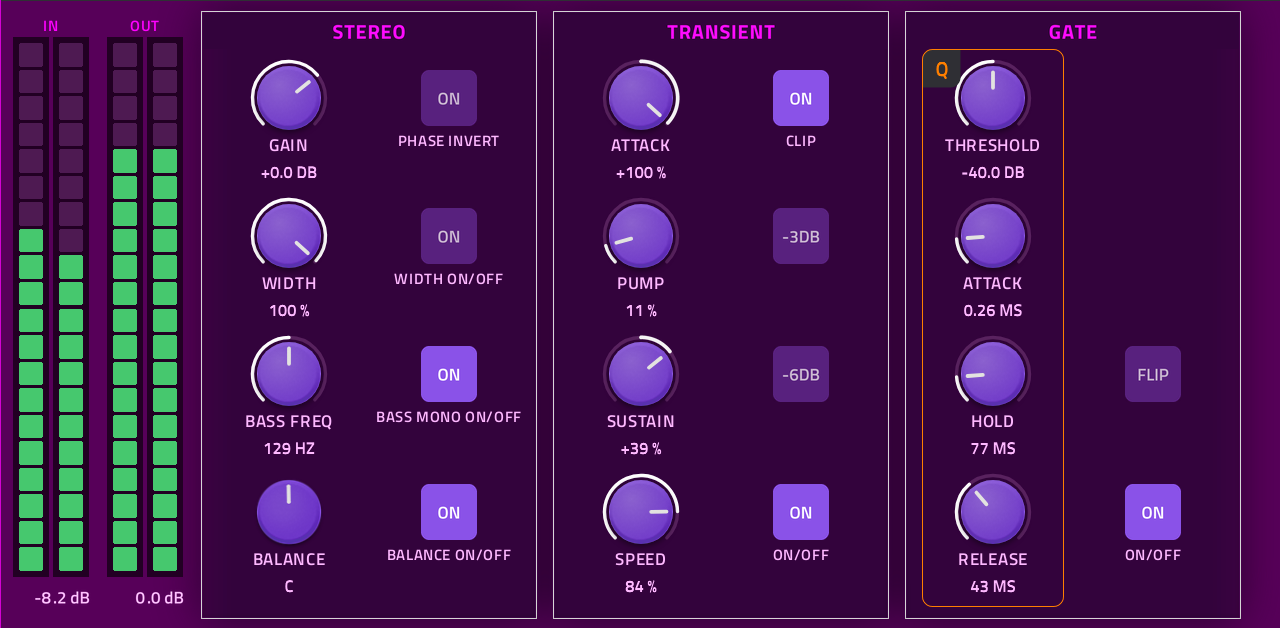
The Q-Links follow the on-screen layout. An orange outline marked Q shows which controls the Q-Links are currently controlling.
Meters
The IN and OUT meters stand side by side at the far left of the INPUT, FILTER, and UTILITY pages, so they stay visible while MPC's Q-Link overlay is active. The number under each meter shows its peak level. When a meter reaches 0.0 dB or above, a red border lights around it.
Input & Stereo Controls
These controls are on the INPUT page.
Gain + Phase
- GAIN: Sets the signal level entering the processing chain, from -∞ dB to +24 dB.
- PHASE INVERT: Inverts the polarity of both the left and right channels.
Width + Bass Mono
- WIDTH: Adjusts the stereo width using Mid/Side processing, from full stereo (100%) down to mono.
- WIDTH ON/OFF: Turns stereo width processing on or off.
- BASS FREQ: Sets the crossover frequency. Low-frequency content below it is summed to mono, while stereo information above it is kept.
- BASS MONO ON/OFF: Turns Bass Mono processing on or off.
Balance
- BALANCE: Shifts the signal toward the left or right channel. C (center) keeps both channels at equal levels.
- BALANCE ON/OFF: Turns balance processing on or off.
Transient
- ATTACK: Adjusts the attack time of the transient processor.
- PUMP: Ducks the audio immediately following the transiet.
- SUSTAIN: Boosts or ducks the body and tail of the sound after the initial transient.
- SPEED: Controls the reaction time and envelope curve of the transient detection.
- CLIP ON/OFF: Cuts off any output peaks exceeding 0.0DB.
- -3DB: Lowers the output level by 3DB.
- -6DB: Lowers the output level by 6DB.
- -9DB: Lowers the output level by 9DB. This is enabled by engaging both the -3DB and -6DB buttons.
- ON/OFF: Turns transient processing on or off.
Noise Gate
The GATE is on the OUTPUT page. This stereo-linked noise gate reduces unwanted low-level audio when the incoming signal falls below the selected threshold.
- THRESHOLD: Sets the signal level at which the gate operates. At its lowest setting it reads OFF, and the gate has no effect.
- ATTACK: Controls how quickly the gate opens when the signal exceeds the threshold.
- HOLD: Determines how long the gate remains open before beginning to close.
- RELEASE: Controls how quickly the gate closes after the hold period.
Filtering
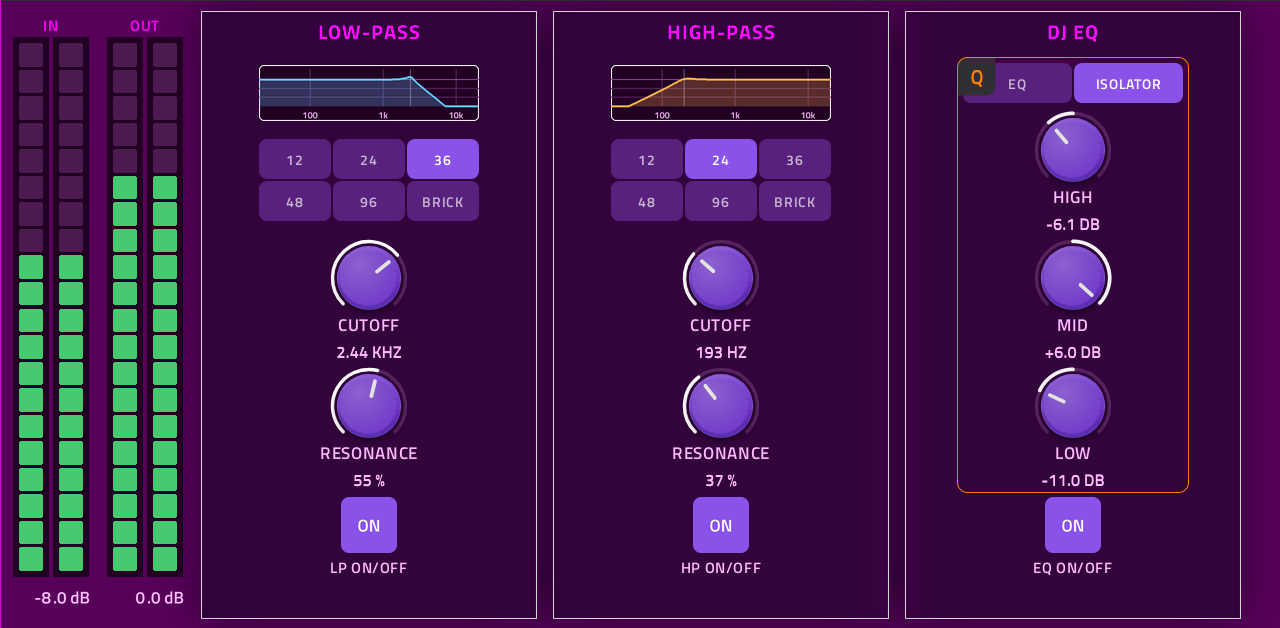
The LOW-PASS and HIGH-PASS filters are on the FILTER page, each in its own column. The low-pass filter reduces frequencies above its cutoff, and the high-pass filter reduces frequencies below its cutoff.
Each filter column provides, from top to bottom:
- Curve display: Shows the filter's response. It reads BYPASSED when the filter is off, or when its cutoff is at the end of its range (20 kHz for the low-pass, 20 Hz for the high-pass).
- Slope buttons: A 3 × 2 grid of buttons under the curve display that selects the filter slope.
- CUTOFF: Sets the filter's operating frequency.
- RESONANCE: Adjusts emphasis around the cutoff frequency.
- LP ON/OFF / HP ON/OFF: Turns each filter on or off.
| Available filter curves | Low-Pass | High-Pass |
|---|---|---|
| 12 dB/octave | 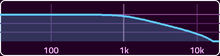 | 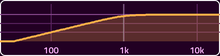 |
| 24 dB/octave | 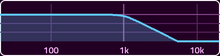 | 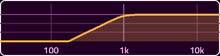 |
| 36 dB/octave | 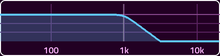 | 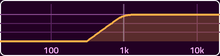 |
| 48 dB/octave | 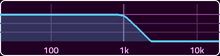 | 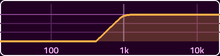 |
| 96 dB/octave | 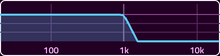 | 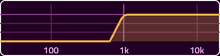 |
| Brickwall | 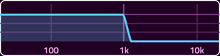 | 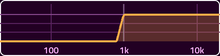 |
DJ EQ
The DJ EQ is on the FILTER page. Its HIGH, MID, and LOW knobs adjust each band, and EQ ON/OFF turns the EQ on or off. Use the EQ and ISOLATOR buttons to choose between two modes.
ISOLATOR Mode DJ-style EQ
Uses phase-aligned Linkwitz-Riley fourth-order (LR4) crossovers to divide the signal into three frequency bands. Each band can be cut to full silence or boosted by up to +6 dB.
| Band | Frequency Range |
|---|---|
| LOW | Below 250 Hz |
| MID | 250 Hz to 2,500 Hz |
| HIGH | Above 2,500 Hz |
Ideal for DJ-style mixing, frequency isolation, and dramatic tonal adjustments.
EQ Mode Traditional EQ
Uses a low shelf, mid bell, and high shelf for conventional three-band equalization. Each band can be reduced by up to -26 dB or boosted by up to +6 dB.
| Band | Filter Type | Frequency |
|---|---|---|
| LOW | Low Shelf | 250 Hz |
| MID | Bell, Q 0.5 | 1,000 Hz |
| HIGH | High Shelf | 2,500 Hz |
Use this mode for general-purpose equalization and tonal correction.
Compressor
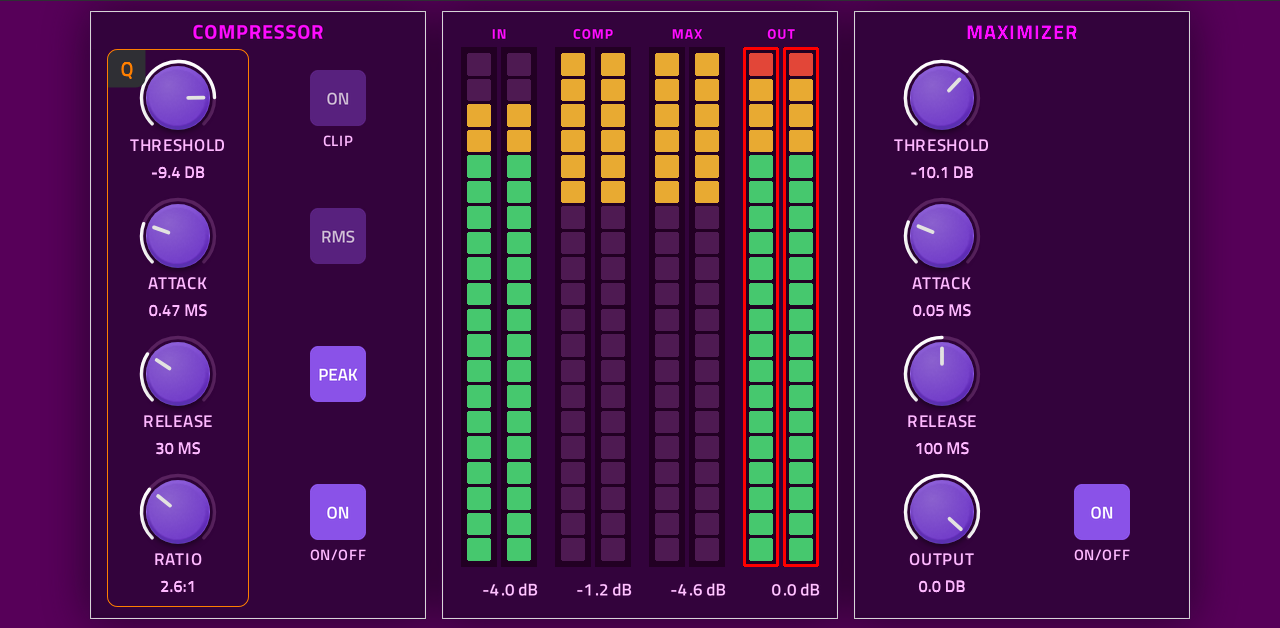
The COMPRESSOR is also on the OUTPUT page. It provides dynamic range control, helping manage loud peaks while maintaining overall level consistency.
- THRESHOLD: Determines when the Compressor begins processing the signal.
- ATTACK: Controls how quickly the Compressor responds to incoming peaks.
- RELEASE: Controls how quickly gain reduction recovers.
- RATIO: Determines the proportion of input-to-output volume reduction once a signal crosses the threshold.
- CLIP ON/OFF: Cuts off any output peaks exceeding -0.1DB and lowers output level by -1DB.
- RMS: References the average energy of an audio signal over time.
- PEAK: References the highest amplitude of an audio signal.
- ON/OFF: Enables or disables the Compressor.
Maximizer
The MAXIMIZER is also on the OUTPUT page. It provides loudness maximization and output level control, helping increase perceived loudness while managing signal peaks.
- THRESHOLD: Determines when the Maximizer begins processing the signal.
- ATTACK: Controls how quickly the Maximizer responds to incoming peaks.
- RELEASE: Controls how quickly gain reduction recovers.
- OUTPUT: Adjusts the final output level.
- ON/OFF: Enables or disables the Maximizer.
Between the Compressor and MAXIMIZER columns, three meters show the Maximizer at work: IN (the level going into the Compressor), COMP (signal level reduced by the compressor), MAX (how hard the Maximizer is working), and OUT (the final output). The number under each meter shows its peak level.
ON/OFF Buttons
Each applicable processing stage has its ON/OFF button. The button is lit while the stage is processing and dimmed while it is off.
Turning a stage off bypasses its processing while the signal continues through the rest of the chain. This makes it easy to compare processed and unprocessed signals, experiment with individual effects, and shape your sound without interrupting the entire signal path.
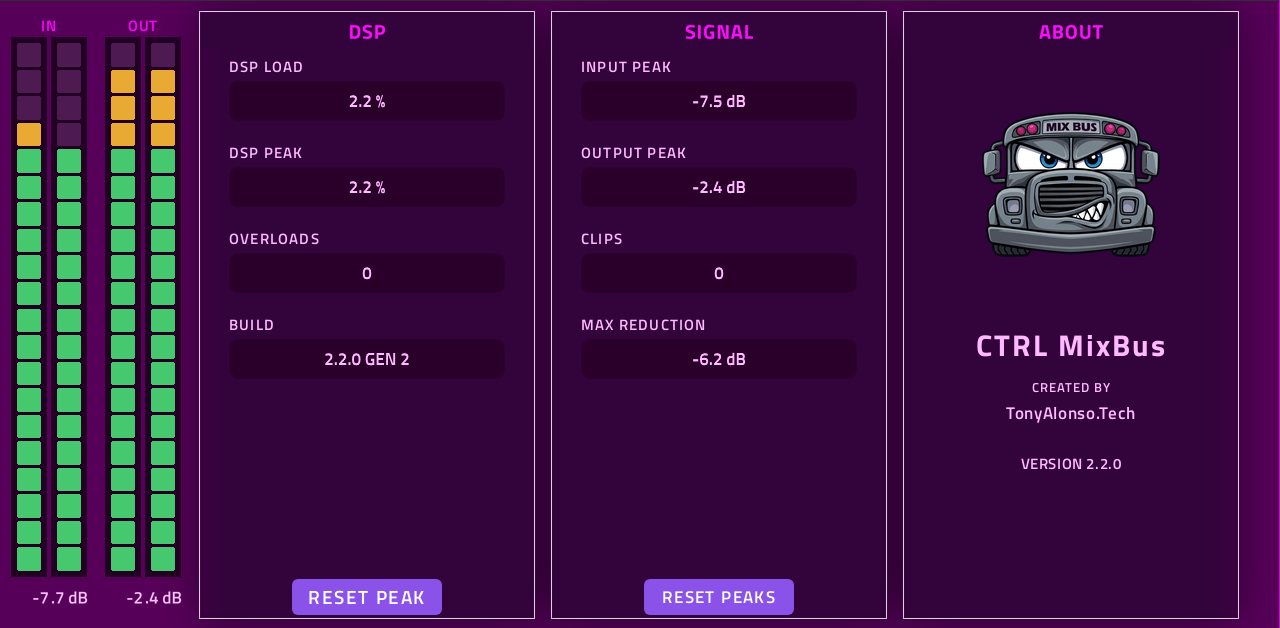
Utility Page
Every CTRL plugin has a UTILITY page. It provides the details needed for debugging and reporting issues, and in synthesizer plugins it also holds settings that change the plugin's overall behavior.
On CTRL MixBus, the UTILITY page shows how the plugin is performing on your device, along with signal readings and plugin information. It is also the page to record when reporting issues.
- IN / OUT meters: The plugin's incoming and outgoing signal levels.
DSP
- DSP LOAD: How much processing power CTRL MixBus is currently using.
- DSP PEAK: The highest DSP load reached since the last reset.
- OVERLOADS: A counter of how many times processing has overloaded.
- BUILD: The plugin's version number and the MPC generation (Gen 1 or Gen 2) the build is for.
- RESET PEAK: Clears the DSP PEAK reading.
SIGNAL
- INPUT PEAK: The highest input level reached since the last reset.
- OUTPUT PEAK: The highest output level reached since the last reset.
- CLIPS: A counter of how many times the signal has clipped.
- MAX REDUCTION: The largest amount of gain reduction applied since the last reset.
- RESET PEAKS: Clears the SIGNAL section's peak readings.
ABOUT
Shows the CTRL MixBus logo and plugin name, who it was created by (TonyAlonso.Tech), and the plugin's version number.